
How to Customize Your Vape Setup: The Complete 2026 Guide
If you picked up a vape kit and never touched the settings, you’re getting maybe 40% of what it can actually do. Customizing your vape setup is the difference between a mediocre experience and one that fits you like a glove. It affects everything from how your juice tastes to how thick your clouds are, how harsh or smooth each hit feels, and how much money you burn through on replacement coils.
When I first started vaping, I ran the same stock coils at the same wattage for months. Once I learned to customize your vape setup properly, the whole experience changed. Better flavor, bigger clouds when I wanted them, and a lot less money wasted on gear that wasn’t tuned right.
This guide walks through every layer of vape customization, from choosing the right mod and atomizer down to building your own coils and dialing in your airflow. Whether you’re running a pod system or a dual-battery box mod, you’ll find something here that levels up your setup.
Why Customize Your Vape Setup?
Most vapers fall into one of two camps. The first camp buys a kit, pops in the stock coil, fills the tank, and vapes at whatever wattage the device suggests. Nothing wrong with that. It works. The second camp tweaks everything until it hits exactly right. Wattage, airflow, coil type, wicking material, drip tip bore, even the PG/VG ratio of their juice. That second camp is where customization lives.
Customizing your vape setup isn’t about chasing some abstract ideal. It’s about solving real problems. Maybe your current setup tastes muted. Maybe it’s too harsh. Maybe you’re spending $20 every two weeks on replacement coils when you could spend $10 a year building your own. These are practical problems with practical solutions.
The four things customization directly controls are flavor, vapor production, throat hit, and cost. Let me break down what that means.
Flavor depends on coil material, wattage, airflow, wicking, and PG/VG ratio. A Kanthal coil at 35W with tight airflow will taste different from an SS316L coil at the same wattage with open airflow. Not better or worse. Different. Customization lets you find the combination that works for your palate.
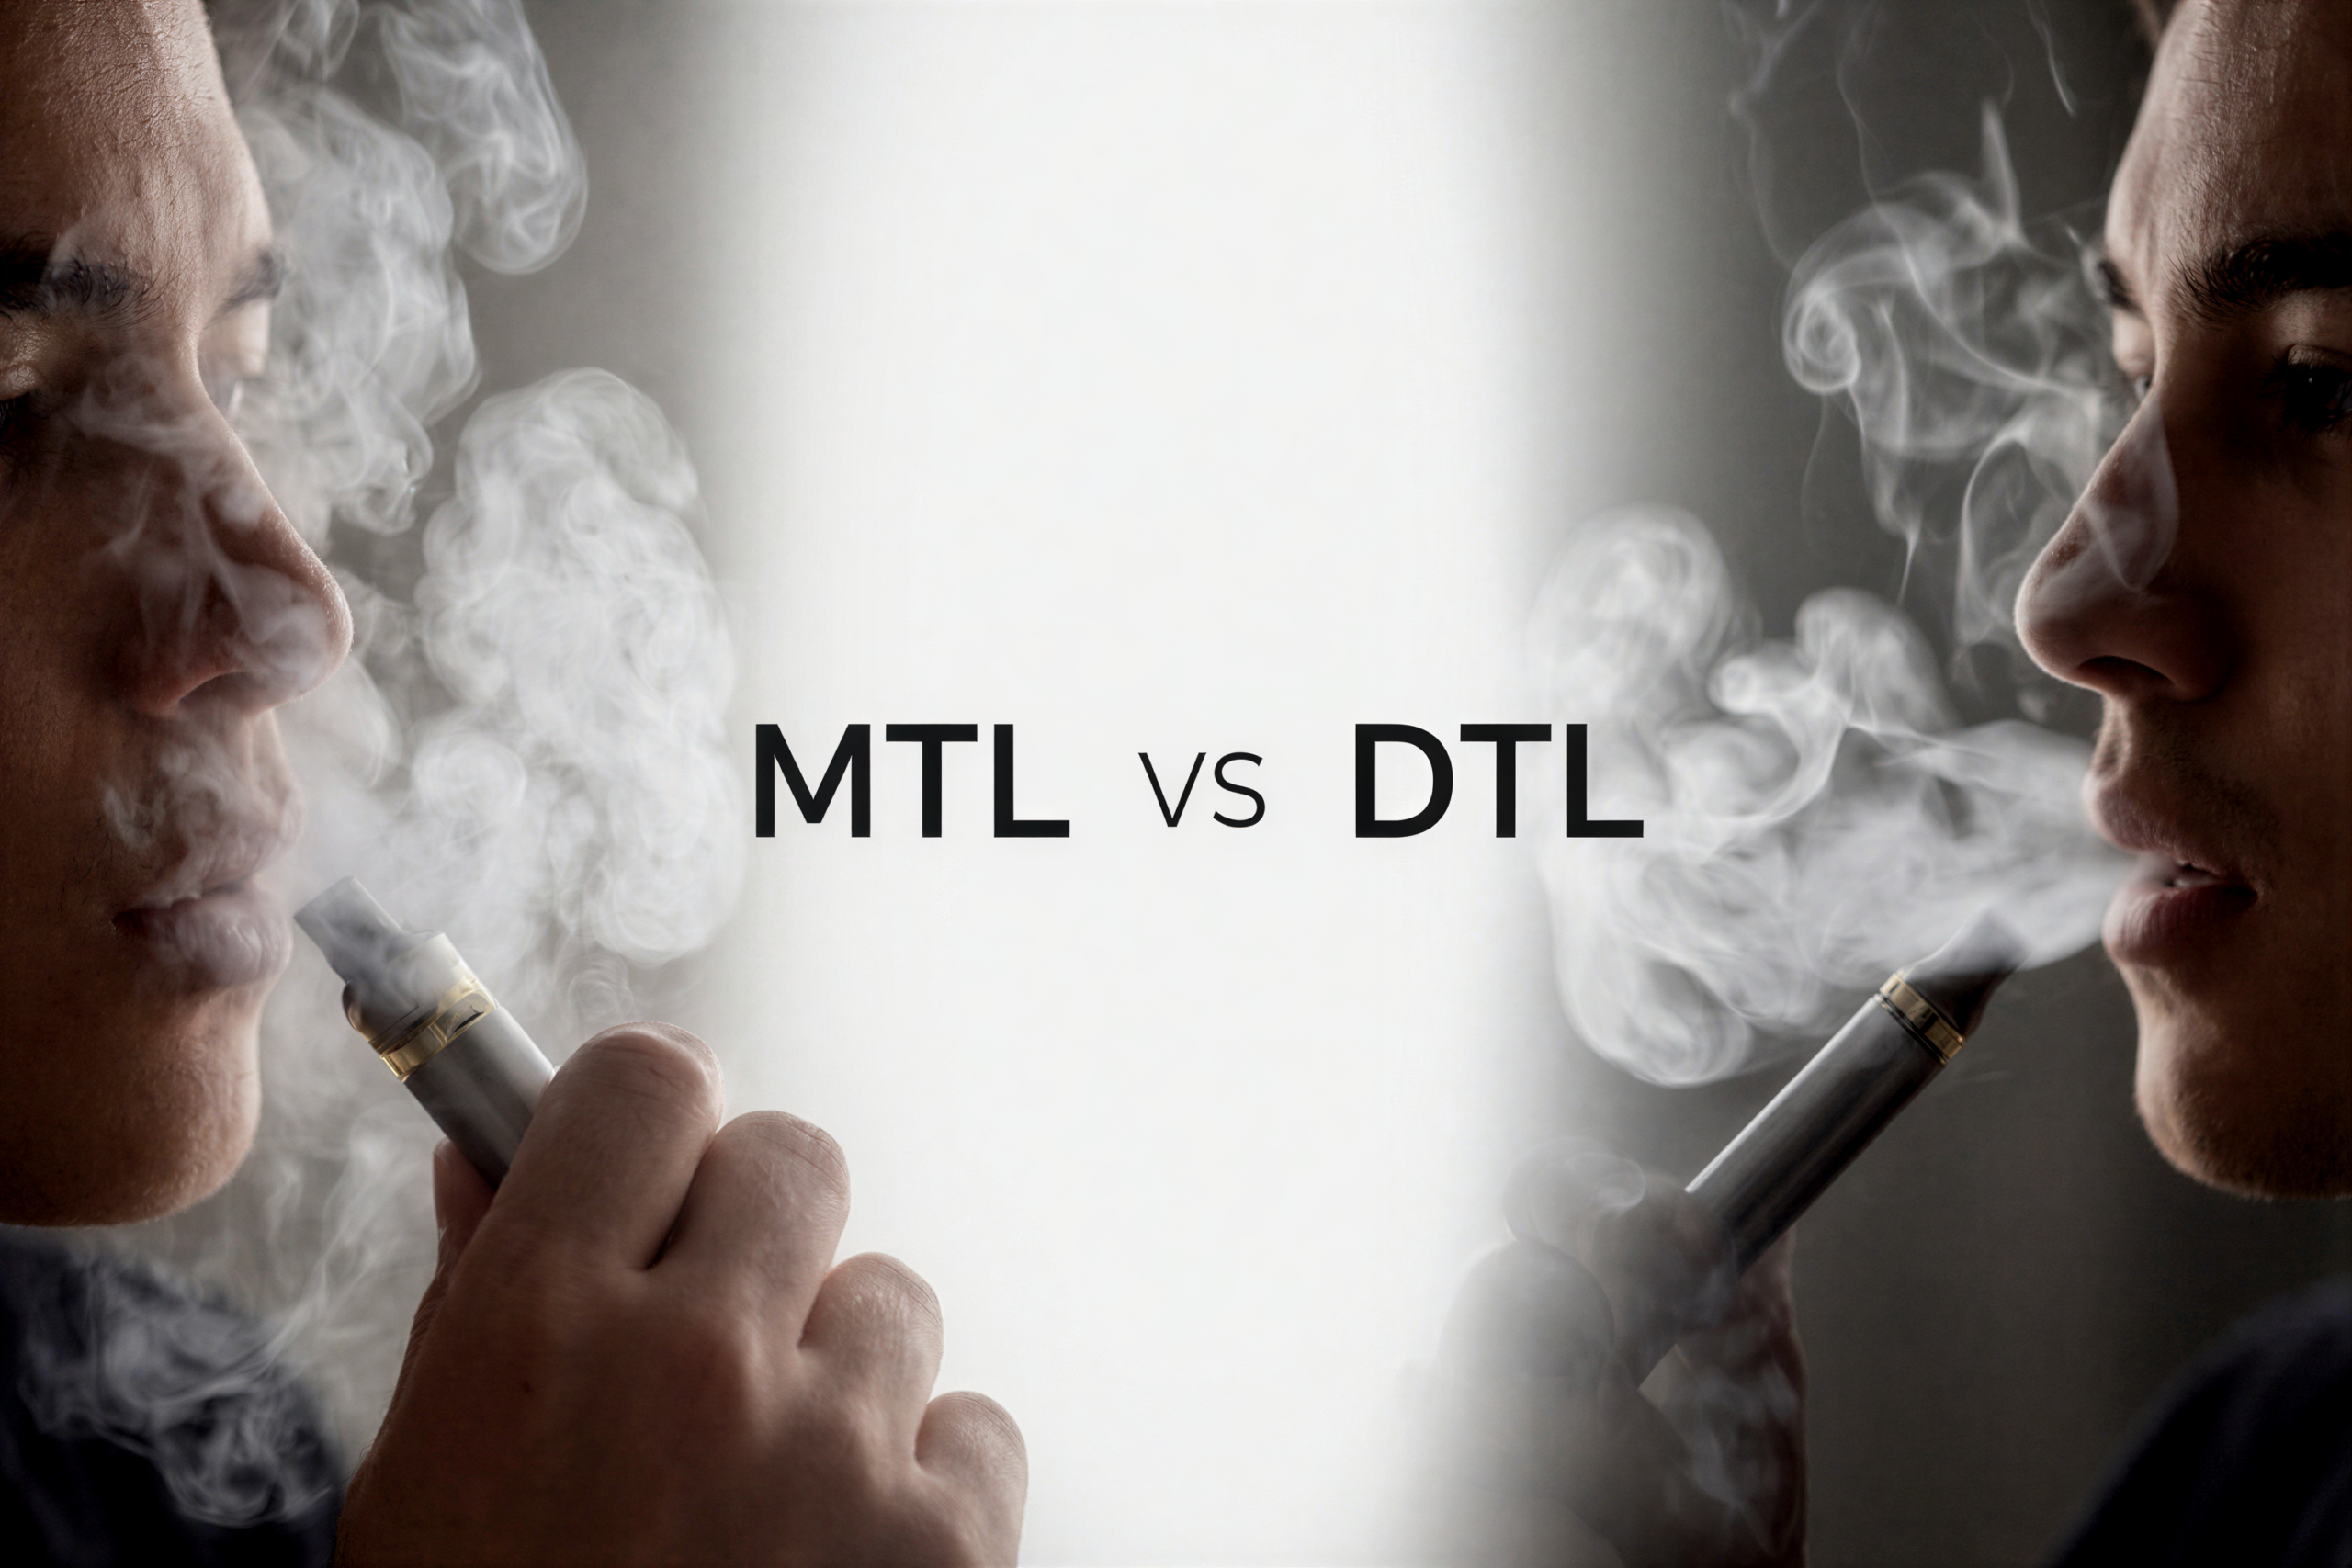
Vapor production is mostly about wattage, coil surface area, airflow, and VG content. More VG plus more wattage plus more airflow equals bigger clouds. But that’s not always what you want. An MTL vaper chasing a cigarette-like experience doesn’t need massive vapor. They need the right balance of throat hit and flavor density.
Throat hit comes from PG content, nicotine strength, wattage, and airflow restriction. A 50/50 PG/VG juice at 12mg nicotine through a tight MTL draw gives a solid throat hit. An 80/20 VG juice at 3mg through a wide-open DTL draw gives almost none. Customization means you can tune this to your preference rather than settling for whatever your stock setup delivers.
Cost is the one people underestimate. Factory replacement coils cost roughly $20 every two weeks if you vape regularly. That’s over $520 a year. A $10 spool of Kanthal wire and organic cotton lasts over a year. Building your own coils saves $400 to $500+ annually. That alone is reason enough to learn customization.
This guide covers mods, atomizers, coil building, e-liquid tuning, airflow and wattage calibration, aesthetic modifications, and safety. By the end, you’ll understand every variable that shapes your vape and how to adjust each one.
Understanding the Core Components
Before you can customize anything, you need to understand what you’re working with. A vape setup has four core components, and each one affects how your customization choices play out.
The Mod
Your mod is the power source. It delivers current to the coil, and how it does that determines what you can and can’t do with your build. There are three main types.
Regulated mods have circuit boards that let you set wattage, voltage, or temperature. They include safety features like short circuit protection, overheat cutoff, and low resistance limits. Most box mods and pod systems fall here. If you’re just getting into vape customization, a regulated mod is where you start. You can find solid options in our best box mods guide.
Mechanical mods have no circuitry. The battery feeds directly to the atomizer. Whatever voltage the battery holds is what hits the coil. No safety features. No wattage adjustment. If you short the coil, the battery dumps its full current until something gives. Mechanical mods are for experienced builders who understand Ohm’s Law and battery safety inside and out. Not beginners.
Squonk mods are regulated or mechanical mods with a built-in juice bottle. You squeeze the bottle to feed juice up through the 510 pin into an RDA. It’s a convenience feature for RDA users who don’t want to drip manually. Squonk mods pair naturally with rebuildable dripping atomizers.
The Atomizer
This is where vaporization happens. The atomizer holds the coil, the wick, and the e-liquid. It determines your build options, flavor quality, and how much maintenance you’re signing up for.
Sub-ohm tanks use factory replacement coils. You screw in a pre-built coil, fill the tank, and vape. Easy and consistent, but limited customization. You’re locked into whatever coil resistances the manufacturer offers.
RDAs (rebuildable dripping atomizers) let you build and install your own coils. No tank. You drip juice directly onto the wick. Maximum flavor potential and full customization over coil type, resistance, and wicking. The tradeoff is that you have to drip every few hits.
RTAs (rebuildable tank atomizers) combine the build deck of an RDA with the tank capacity of a sub-ohm tank. You build your own coils and wick them, but juice feeds from the tank instead of manual dripping. More complex to build than an RDA because wicking has to be precise to avoid flooding or dry hits.
RDTAs (rebuildable dripping tank atomizers) sit between RDAs and RTAs. They have a build deck on top with a tank underneath. Gravity and wicking feed juice up to the coils. Easier to wick than most RTAs, with flavor closer to an RDA.
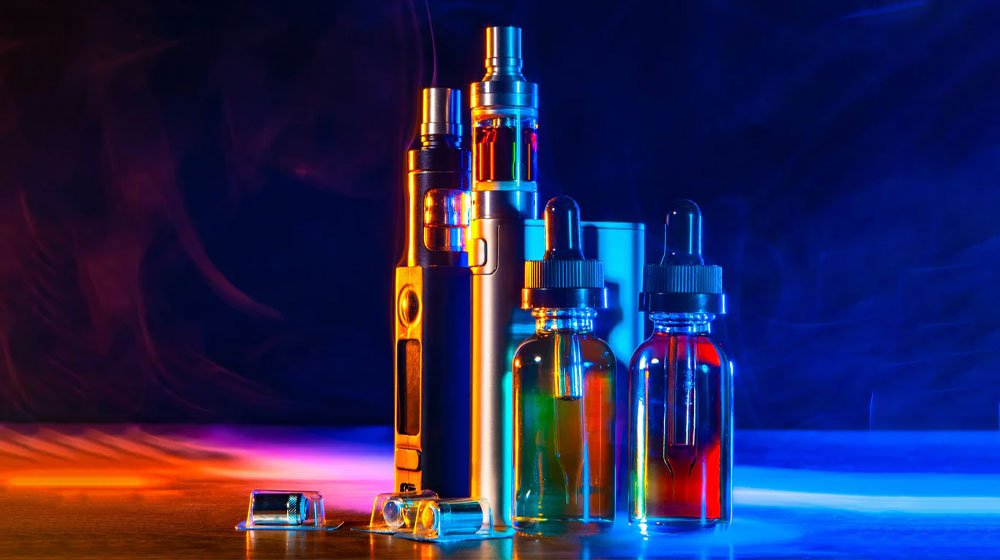
Coils and E-Liquid
Coils and e-liquid are the two consumables in your setup, and they interact constantly. The coil material, resistance, and surface area determine how the e-liquid vaporizes. The e-liquid’s PG/VG ratio and nicotine strength determine how that vapor feels and tastes. We’ll dig deep into both in later sections.
Batteries round out the core components. They supply the current that heats the coil. Battery choice matters more than most people realize, especially for sub-ohm and high-wattage builds. We cover battery safety in detail in the safety section.
Choosing the Right Mod for Your Style
Your mod sets the boundaries for what you can do. A single-battery pod system has very different customization potential than a dual-21700 box mod. Pick the wrong mod and you’ll hit a ceiling fast.
Box Mods: Power and Flexibility
Box mods are the most versatile option for customization. Dual-battery models run up to 200W or more, support temperature control, and work with virtually any atomizer. Single-battery models are more compact but top out around 80W, which is enough for most builds but limiting if you want to run low-resistance dual coils at high wattage.
When shopping for a box mod for customization, look for two things. First, wattage range. You want a mod that goes low enough for MTL builds (5-10W minimum) and high enough for DTL dual-coil setups (80W+). Second, temperature control support. If a mod supports TC, it opens up SS316L, Ni200, and Titanium coil options. If it doesn’t, you’re limited to wattage-mode wires like Kanthal and Ni80.
Some box mods also offer bypass mode, which mimics a mechanical mod’s direct voltage output while keeping the safety protections of a regulated device. Useful if you want the mechanical experience without the risk.
Pod Systems: Convenience with Limits
Pod vapes have come a long way. Many now offer adjustable wattage, airflow control, and even replaceable coils. But they still have hard limits on customization. You’re usually restricted to the manufacturer’s coil lineup, and power output is capped. Pod systems are great for MTL and RDL vaping, but they’re not built for sub-ohm cloud production or coil building.
That said, for someone who wants a solid vape without the maintenance, pods are hard to beat. You can still customize your experience through coil selection (different resistances within the pod’s range), airflow adjustment, and e-liquid choice.
Squonk Mods: Built for RDA Users
If you want the flavor and customization of an RDA but hate dripping every few puffs, a squonk mod solves that. The internal juice bottle feeds e-liquid through the 510 connection directly to your coils. Squonk mods are available in both regulated and mechanical versions. Regulated squonkers give you wattage and TC control. Mechanical squonkers are simpler but demand the same safety knowledge as any other mech mod.
Mechanical Mods: Advanced Only
I need to be direct here. Mechanical mods have no safety features. If you build too low, the battery can vent or worse. If you short the coil, there’s no protection circuit to save you. Mech mods reward experienced builders with direct, responsive power delivery. But they punish mistakes. If you don’t know Ohm’s Law cold, can’t calculate current draw from your build, and don’t understand battery CDR ratings, stay away from mechanical mods until you do.
For regulated alternatives that give a similar feel, look at mods with bypass mode. You get the direct voltage behavior of a mech with the safety net of a regulated device.
Atomizer Selection: Where Flavor and Clouds Begin
Your atomizer does more to shape your vape experience than any other component. The right atomizer makes customization easy. The wrong one makes it impossible. Here’s how each type fits into a custom vape setup.
Sub-Ohm Tanks: Easy and Consistent
Sub-ohm tanks are the plug-and-play option. Pop in a factory coil, prime it, fill the tank, and go. Modern sub-ohm tanks from brands like Freemax, Horizon Tech, and Vaporesso produce excellent flavor and vapor. The mesh coil designs in current tanks have gotten really good.
The downside for customization is obvious. You can only use the coils the manufacturer makes. If they don’t offer a resistance you want, or a coil material you prefer, you’re stuck. You also can’t rebuild factory coils. When they burn out, you replace them. That said, for vapers who want solid performance without the learning curve of building, sub-ohm tanks are a perfectly valid choice. You can still customize through wattage, airflow, and e-liquid selection.
RDAs: Maximum Flavor, Full Control
Rebuildable dripping atomizers are the gold standard for flavor and customization. Because the coils sit directly under the drip tip with no chimney narrowing the vapor path, you get the purest flavor your setup can produce. The build deck is wide open. You can run single coils, dual coils, exotic builds like staggered fused Claptons, or simple round wire. The choice is entirely yours.
The tradeoff is convenience. RDAs hold very little juice. You drip directly onto the coils or use a squonk mod to feed from below. For home use, this isn’t a big deal. For on-the-go vaping, it gets old fast. Pairing an RDA with a squonk mod is the most popular way to get RDA flavor with tank-level convenience.
RTAs: Build Your Own with Tank Convenience
RTAs give you the build freedom of an RDA with the juice capacity of a tank. The build deck is at the bottom, and the chimney and bell sit above it. Wicking is the tricky part. Too much cotton and you choke off juice flow. Too little and you flood the chamber or get dry hits.
Modern RTAs have gotten much more forgiving. Deck designs are easier to build on, and juice flow channels are better engineered. If you want to build your own coils but don’t want to carry a bottle of juice everywhere, an RTA is the answer. Flavor is slightly below an RDA due to the chimney, but the gap has narrowed significantly with current designs.
RDTAs: Best of Both Worlds
RDTAs put the build deck on top with a tank underneath. Juice wicks up from the tank to the coils through gravity and capillary action. They’re easier to wick than most RTAs because the wick tails just need to reach down into the tank. Flavor sits between an RDA and an RTA, closer to the RDA side. RDTAs are a solid middle ground if you want build flexibility and tank capacity without the wicking precision an RTA demands.
Coil Customization: The Heart of Your Vape
If there’s one area where customization makes the biggest difference, it’s coils. The coil determines resistance, ramp-up speed, flavor production, and vapor output. It’s where the electricity meets the juice, and every variable matters.
Pre-Built Coils vs Building Your Own
Factory coils are convenient. They’re consistent, easy to install, and require no special knowledge. But they limit your options to whatever the manufacturer offers, and they’re expensive over time.
Building your own coils opens up every variable. You choose the wire type, wire gauge, number of wraps, coil diameter, and coil configuration (single, dual, exotic). It takes some practice and a small upfront investment in tools, but the payoff is huge. Better performance, lower cost, and total control over your vape.
Here’s the cost breakdown. Factory replacement coils run roughly $20 every two weeks for a regular vaper. That adds up to over $520 a year. A $10 spool of Kanthal wire and some organic cotton will last over a year. Even if you factor in the one-time cost of coil building tools (around $30-40 for a kit), you’re still saving $400 to $500+ per year. That’s a vacation. Or a lot of e-liquid.
Coil Materials Comparison
Not all wire is the same. Each coil material has distinct properties that affect ramp-up time, flavor, mode compatibility, and safety. Here’s how they compare.
| Material | Wattage Range | Mode | Key Characteristics |
|---|---|---|---|
| Kanthal A1 | 7-70W | Wattage only | Stable resistance, beginner friendly, most common wire |
| Nichrome 80 (Ni80) | 10-60W | Wattage only | Faster ramp-up than Kanthal, slightly lower resistance per wrap |
| Stainless Steel 316L | 10-75W | Wattage and TC | Dual-mode compatibility, clean flavor, versatile |
| Nickel (Ni200) | 10-50W | TC only | Dry hit prevention, TC precision, soft wire |
| Titanium | 10-45W | TC only | Clean flavor in TC, never overheat (TiO2 risk at high temps) |
Kanthal A1 is the workhorse wire. It’s cheap, holds its shape well, and produces consistent results. The resistance stays stable across temperature changes, which is why it only works in wattage mode. If you’re building your first coil, start with Kanthal. It forgives handling mistakes better than softer wires.
Ni80 ramps faster than Kanthal because it has lower resistance per wrap. That means you reach vaping temperature quicker, which some vapers prefer for a snappier draw. The flavor profile is slightly different, cleaner to some palates. Like Kanthal, it’s wattage mode only.
SS316L is the most versatile wire available. It works in both wattage and temperature control modes. In wattage mode, it behaves similarly to Kanthal with a slightly lower resistance per wrap. In TC mode, you can set a temperature limit and the mod will automatically adjust power to stay within it. This prevents dry hits and extends coil life. If you want one wire that does everything, SS316L is it.
Ni200 and Titanium are TC-only wires. Ni200 has a very steep resistance curve with temperature, which makes it precise for TC but means you should never fire it in wattage mode. Titanium has a similar TC profile with clean flavor, but there’s a catch. If titanium overheats, it can form titanium dioxide (TiO2), which is hazardous. Never dry-fire titanium coils to the point of glowing. In TC mode with proper temperature limits, both wires are safe and perform well.
Resistance and Style Guide
Resistance isn’t just a number. It determines your vaping style, power requirements, and the kind of experience you’ll get. Here’s how resistance maps to the three main vaping styles.
| Style | Resistance Range | Wattage Range | Airflow | Draw Character |
|---|---|---|---|---|
| MTL (mouth-to-lung) | 0.8-1.5 ohm | 8-20W | Tight | Cigarette-like, concentrated flavor |
| RDL (restricted direct-lung) | 0.3-0.8 ohm | 20-45W | Moderate | Loose MTL or tight DTL, balanced |
| DTL (direct-to-lung) | 0.1-0.3 ohm | 40-100W+ | Wide open | Big clouds, smooth inhale |
If you’re coming from smoking and want something that feels familiar, MTL is your starting point. Higher resistance, lower wattage, tighter draw. It mimics the sensation of pulling smoke into your mouth before inhaling. For more on the differences between these styles, check out our guide on MTL vs DTL vs RDL vaping.
RDL sits in the middle. It’s looser than MTL but not as wide open as DTL. Many vapers settle here because it balances flavor and vapor production without requiring massive wattage or huge lung capacity.
DTL is for cloud chasers and flavor enthusiasts who want the biggest, warmest, most vapor-dense hits. Low resistance, high wattage, and airflow cranked open. It takes more e-liquid and more battery power, but the vapor production is unmatched.
Step-by-Step: Building Your First Coil
Building coils sounds intimidating, but it’s a learnable skill. Here’s what you need and how to do it.
Tools you need:
- Wire cutters or nail clippers
- Small screwdriver or coiling tool (matching your desired inner diameter, usually 2.5mm or 3mm)
- Ceramic tweezers (for squeezing coils while firing)
- Ohm reader or a mod that reads resistance
- Organic cotton (unbleached)
- Wire (start with 26-gauge Kanthal A1)
- Scissors for trimming cotton
Step 1: Wrap the coil. Hold the wire against your coiling tool or screwdriver. Wrap it tightly around the shaft, keeping each wrap close to the previous one. For a basic single-coil MTL build with 26-gauge Kanthal on a 2.5mm bit, 7 to 8 wraps will give you roughly 1.0 to 1.2 ohms. For a DTL build on a 3mm bit, 5 to 6 wraps with 24-gauge Kanthal will land around 0.3 to 0.4 ohms.
Step 2: Mount the coil. Insert the legs of your coil into the post holes on your build deck and tighten the screws. Make sure the coil is positioned over the airflow and centered. The coil shouldn’t touch the deck, the posts, or the cap. Any metal-to-metal contact besides the screws creates a short.
Step 3: Check resistance. Fire the mod briefly (with no wick installed) at low wattage. Your mod should display the resistance. Compare it to what you expected based on your wraps and wire gauge. If it reads significantly lower than expected, you might have a short. If it reads “check atomizer” or shows an error, you definitely have a short. Fix it before proceeding.
Step 4: Pulse and squeeze. Fire the coil at low wattage (10-15W) in short pulses. The coils should glow from the center outward evenly. If one side glows first, that side has a hot leg. Use your ceramic tweezers to gently squeeze the coils together while pulsing until they all glow evenly from the inside out. This is called “strumming” the coil, and it ensures even heat distribution.
Step 5: Wick the coil. Cut a strip of organic cotton. Roll one end to a point and thread it through the coil. It should slide through with light resistance. Too loose and you’ll get flooding. Too tight and you’ll get dry hits. Trim the cotton tails so they just touch the deck or sit in the juice wells. Fluff the ends slightly with tweezers.
Step 6: Prime and test. Saturate the cotton with e-liquid before firing. Start at a low wattage and work your way up. If you hear crackling and get smooth vapor, your build is good. If you get a burnt taste, stop immediately. Your wick might be too tight, or you might be running too much wattage for the coil.
Common Coil Building Mistakes
The most common mistake beginners make is using too much cotton. Overpacking the coil chokes juice flow and causes dry hits even at low wattage. The cotton should slide through with a gentle tug. If you have to force it, it’s too thick.
Another frequent error is not checking for hot spots. A coil with uneven glow will produce hot spots that burn the wick in one area while leaving other parts underheated. Always pulse and squeeze until the coil glows uniformly.
Forgetting to trim cotton tails to the right length is another one. Cotton that’s too long can block juice flow in RTAs and RDTAs. Cotton that’s too short won’t reach the juice source and will dry out. The tails should just touch the deck or sit lightly in the juice wells.
Finally, don’t fire your coil without checking resistance first. If you accidentally created a short, firing it can damage your mod or your battery. Always verify resistance on a reader or your mod before pulsing.
E-Liquid Tuning: PG/VG Ratios and Nicotine
E-liquid is the fuel for your custom vape setup. You can have the perfect coil and the ideal wattage, but if your juice doesn’t match your build, the whole thing falls flat. The two variables that matter most for customization are PG/VG ratio and nicotine strength.
How PG/VG Ratio Affects Your Vape
Propylene glycol (PG) and vegetable glycerin (VG) are the two base liquids in every e-juice. They have opposite properties, and their ratio determines how your vape performs.
PG is thin, carries flavor well, and produces a noticeable throat hit. It’s what gives vaping that sensation in the back of your throat. VG is thick, produces dense vapor clouds, and adds a slight sweetness. It’s smooth on the throat but can mute flavor at high concentrations.
| PG/VG Ratio | Best For | Throat Hit | Vapor | Flavor | Notes |
|---|---|---|---|---|---|
| 50/50 PG/VG | MTL | Strong | Light | Strong | Thin consistency, works in all devices |
| 60/40 VG/PG | All-round | Moderate | Decent | Good | Balanced for most setups |
| 70/30 VG/PG | Sub-ohm / RDL | Mild | Big | Good | Standard for sub-ohm tanks |
| 80/20 VG/PG | DTL cloud | Light | Very big | Slightly muted | Needs high wattage |
| Max VG | Cloud chasers | Minimal | Maximum | Can be muted | Very thick, needs low-resistance builds |
Here’s the practical takeaway. If you’re vaping MTL at 8 to 20 watts, use 50/50 juice. The thin consistency feeds well through the small juice channels in MTL coils, the throat hit is solid, and the flavor comes through strong. If you’re running a sub-ohm tank at 50 to 80 watts, 70/30 VG/PG is the sweet spot. Big clouds, good flavor, smooth hit. If you’re chasing maximum vapor production on a high-wattage DTL build, go 80/20 or max VG. But be aware that max VG juice can mute flavor and may not wick well in some tanks.
Nicotine Strength by Style
Nicotine strength needs to match your vaping style. Using high-nicotine juice in a DTL setup will make you dizzy or nauseous. Using low-nicotine juice in an MTL setup won’t satisfy cravings.
For MTL vaping, 6 to 12mg/mL (freebase nicotine) is the standard range. MTL delivers less vapor per puff, so you need higher concentration to get the same nicotine intake. For RDL vaping, 3 to 6mg/mL works for most people. For DTL, 1.5 to 3mg/mL is typical. DTL moves a lot more vapor per puff, so lower concentration is needed.
Nicotine salts are a different category. They’re absorbed faster and smoother than freebase nicotine, making them popular in low-wattage pod systems. Salt nicotine at 20 to 50mg/mL is common in pod devices but should never be used in sub-ohm or DTL setups. For more on nicotine levels, see our guide on how much nicotine is in a vape.
Matching E-Liquid to Your Build
Think of your coil, wattage, and e-liquid as a system. A 1.0-ohm MTL coil at 12W with 50/50 juice and 12mg nicotine gives a tight, flavorful, throat-hit-forward experience. A 0.15-ohm mesh coil at 80W with 70/30 VG juice and 3mg nicotine gives a smooth, cloudy, flavor-rich experience. Both are good. They’re just different. The key is making sure all three variables work together instead of fighting each other.
If you change one variable, you often need to adjust the others. Switching from MTL to DTL means dropping nicotine, increasing VG, and lowering resistance. Switching from DTL to MTL means the opposite. Every change cascades through the system.
Airflow and Wattage: Fine-Tuning Your Experience
Airflow and wattage are the two dials you’ll adjust most often. They interact constantly, and getting them right is what separates a good vape from a great one.
How Airflow Affects Flavor and Vapor
Airflow does two things. It cools the coil, and it dilutes the vapor. Tight airflow means less cooling and less dilution, which gives you warmer, more concentrated flavor. Open airflow means more cooling and more dilution, which gives you cooler vapor and bigger clouds.
The relationship is direct. Tight airflow plus high resistance equals warmer, more concentrated flavor. That’s the MTL formula. Open airflow plus low resistance equals cooler, bigger clouds. That’s DTL. Closing down the airflow on a sub-ohm coil running at high wattage is a common mistake. It restricts cooling, which can lead to dry hits and even burn your wick. If you’re running sub-ohm, keep the airflow relatively open.
Airflow position matters too. Bottom airflow atomizers tend to produce slightly cooler vapor and better flavor because air hits the coil directly from below. Top airflow designs are less prone to leaking but can sacrifice a small amount of flavor because the air path is longer. Side airflow sits between the two. These are subtle differences, but customization is about subtleties.
For a deeper dive into airflow mechanics, check out our guide on how to adjust airflow on a vape.
Wattage Calibration: Start Low and Work Up
Every coil has a sweet spot. Too little wattage and the coil barely vaporizes the juice. Too much and you scorch the wick. The trick is finding the right range and then fine-tuning within it.
The rule is simple. Start low and work up. If a coil is rated for 30 to 60W, start at 30. Take a few puffs. If the vapor is cool and flavor is weak, bump it up 5W. Repeat until you hit the sweet spot where flavor is full, vapor is satisfying, and the hit isn’t harsh. Usually, you’ll land somewhere in the middle to upper range of the coil’s rated wattage, but not always. Some coils perform best at the lower end.
| Resistance | Style | Starting Wattage | Typical Sweet Spot |
|---|---|---|---|
| 1.0-1.5 ohm | MTL | 8W | 10-16W |
| 0.5-0.8 ohm | RDL | 18W | 22-35W |
| 0.3-0.5 ohm | DTL | 30W | 40-60W |
| 0.1-0.3 ohm | DTL (high power) | 40W | 60-90W |
These are starting points, not rules. Your juice, airflow, and personal preference all shift the sweet spot. A 70/30 VG juice at 0.4 ohms might hit best at 45W, while the same coil with 50/50 juice might be perfect at 35W. Experiment.
Temperature Control Explained
Temperature control (TC) mode uses the resistance change of certain wires to estimate coil temperature and automatically adjust power to keep it within a set limit. It’s a different way to vape that has real advantages once you understand it.
TC only works with wires whose resistance changes predictably with temperature. That’s SS316L, Ni200, and Titanium. Kanthal and Ni80 have very stable resistance across temperatures, so they can’t be used in TC mode.
| Wire | TC Range | Notes |
|---|---|---|
| SS316L | 400-550°F (200-280°C) | Most versatile TC wire, also works in wattage mode |
| Ni200 | 350-500°F (175-260°C) | Very precise TC, but soft wire that’s easy to deform |
| Titanium | 300-450°F (150-230°C) | Clean flavor, but never dry-fire to glowing (TiO2 risk) |
The big benefit of TC is dry hit prevention. When the wick dries out, the coil temperature spikes because there’s no liquid to absorb the heat. In wattage mode, the coil keeps getting hotter until the cotton burns. In TC mode, the mod detects the temperature rise and cuts power before it reaches the burning point. Your cotton lasts longer, your coils last longer, and you never get that awful burnt cotton taste.
TC also gives consistent flavor from the first puff to the last. In wattage mode, the coil temperature varies as battery voltage drops and as wicking conditions change. TC compensates for both automatically.
Common Tuning Mistakes
The most common mistake I see is cranking wattage too high on a fresh coil. New coils need time to break in. The wire needs a few pulses to settle, and the cotton needs to be fully saturated. Start 10 to 15W below your target and work up over the first 10 to 15 puffs.
Another frequent error is mismatching airflow and wattage. Running high wattage with tight airflow creates excessive heat that can burn the wick. Running low wattage with open airflow gives weak, cool vapor with muted flavor. Airflow and wattage need to move in the same direction. More wattage needs more airflow. Less wattage needs less airflow.
Ignoring coil resistance limits on your mod is dangerous. Every mod has a minimum supported resistance. Going below it can damage the mod or trigger safety protections that shut it down. Check your mod’s specs before building ultra-low resistance coils.
Aesthetic Customization: Making It Yours
Not all customization is about performance. Some of it is about making your setup look and feel the way you want. Vape gear spends a lot of time in your hand. It might as well feel right.
Skins and Wraps
Vinyl wraps are the easiest way to change your mod’s appearance. They come in hundreds of patterns, carbon fiber textures, wood grain, camo, solid colors, and custom prints. A good wrap also protects the mod’s finish from scratches and dings. Application takes about five minutes, and most wraps can be removed without leaving residue. Companies like JWraps and DecalGirl make wraps for most popular mods.
Drip Tip Upgrades
The drip tip is the one part of your vape that touches your mouth every single puff. Swapping it changes both feel and performance. Drip tips come in three bore sizes. Narrow bore (510, around 8.5mm outer diameter) concentrates vapor for a warmer, more flavorful draw. Wide bore (810, around 14mm outer diameter) opens up airflow for cooler, cloudier hits. Chuff caps are the widest option, used almost exclusively on RDAs for maximum airflow.
Material matters too. Delrin and Ultem drip tips stay cool even at high wattage. Stainless steel looks great but conducts heat, so it can get warm on high-power builds. Resin tips come in wild color patterns and stay reasonably cool. Glass tips don’t affect flavor at all and are easy to clean, but they’re fragile.
LED and Panel Customization
Some mods come with customizable LED lighting. You can set the color, pattern, and activation trigger (always on, firing, or pulse). It’s pure aesthetics, but it adds personality. Resin panels are another option for certain mods. They replace the stock side panels with colorful resin blocks that are unique to each unit since the pouring process creates one-of-a-kind patterns.
Custom engraving services exist for high-end mods. Your name, a logo, or a design laser-etched into the metal. It’s not cheap, and it’s permanent, but for a mod you plan to keep for years, it makes it unmistakably yours.
Safety: Non-Negotiable Rules
I’ve saved safety for last in this guide, but it’s not an afterthought. It’s the foundation everything else is built on. A custom vape setup that ignores safety is a custom vape setup that can hurt you. These rules are non-negotiable.
Battery Safety
Your batteries are the most powerful component in your setup. A single 18650 cell stores enough energy to cause serious harm if mishandled. Here are the rules.
Use batteries rated for your build. For sub-ohm vaping, 18650 cells need a continuous discharge rating (CDR) of at least 20A. For high-power builds, 21700 cells with 30A+ CDR are better. Never exceed a battery’s CDR. If your build draws more current than the battery can safely deliver, you risk thermal runaway. To find the right cells, check our guides on the best 18650 batteries and best 21700 batteries for vaping.
Keep married batteries together. If you use a dual-battery mod, always use the same pair of batteries. Charge them together, discharge them together, and replace them together. Mixing batteries with different charge levels or age stresses the weaker cell, which can lead to failure.
Check battery wraps constantly. The plastic wrap around a battery is the only thing preventing the metal case from shorting against your mod or keys. Any tear, nick, or dent in the wrap means you need to rewrap or replace the battery immediately. Battery wrap kits cost about $2 and take 30 seconds to apply with a hair dryer. There is no excuse for running a battery with a damaged wrap.
The FDA provides additional battery safety guidance at their vape battery safety page. Read it.
Ohm’s Law for Vapers
Ohm’s Law is the math that keeps you safe when building coils. The formula is simple. Current (amps) equals voltage (volts) divided by resistance (ohms). I = V / R.
Here’s why it matters. If you build a 0.2-ohm coil on a fully charged battery at 4.2 volts, the current draw is 4.2 / 0.2 = 21 amps. If your battery is rated for 20A continuous discharge, you’re already over the limit. That’s dangerous.
Another way to look at it. Power (watts) equals voltage squared divided by resistance. W = V² / R. That same 0.2-ohm build at 4.2V draws 4.2² / 0.2 = 88.2 watts. If your battery can’t safely deliver that much current, something has to give. Usually the battery.
For regulated mods, the circuit board handles this math for you. You set the wattage and the mod adjusts the output accordingly. But for mechanical mods, you are the safety system. If you don’t calculate current draw before firing, you’re gambling.
For more detailed battery science, Battery University is an excellent resource.
When NOT to Build
Don’t build if your calculated current draw exceeds the battery’s CDR. Don’t build if you don’t have an ohm reader or a mod that measures resistance. Don’t build on a mechanical mod if you can’t calculate current draw from memory. Don’t build with damaged batteries. Don’t build if you’re tired, distracted, or rushed. Coil building requires focus and precision. A sloppy build on a mech mod is a hazard.
Coil Checking Before Firing
Every time you install a new coil, check it before you fire. Use an ohm reader or your mod’s resistance display. Verify the resistance is what you expected. Look for shorts. Make sure the coil isn’t touching the deck or cap. Pulse at low wattage and check for even glow. These steps take 30 seconds and they prevent 99% of coil-related problems.
Maintenance Schedule
Regular maintenance keeps your custom vape setup performing well and staying safe. Rewick every 3 to 7 days depending on your juice and usage. Sweet e-liquids gunk up cotton faster. Clean your atomizer every time you rewick. Rinse with warm water and dry completely. Check battery wraps every time you handle a battery. Clean your mod’s 510 connection weekly with a cotton swab and rubbing alcohol. Replace coils when flavor drops off or you need significantly more wattage to get the same vapor. That’s a sign the coil is gunked and can’t wick efficiently anymore.
FAQ
What’s the easiest customization for beginners?
Adjusting airflow and wattage. Both take seconds, require no tools, and make an immediate difference. Start by finding your coil’s sweet spot wattage, then fine-tune the airflow to balance flavor and vapor. After that, experimenting with different PG/VG ratios in your e-liquid is the next easiest step. No hardware changes needed.
Do I need to build coils to customize my vape setup?
No. You can customize your vape setup significantly without ever building a coil. Wattage, airflow, e-liquid selection, and drip tip swaps all change the experience without any building. That said, coil building unlocks the deepest level of customization and saves you hundreds of dollars per year. It’s worth learning when you’re ready.
Can I use temperature control with any coil?
No. TC only works with wires whose resistance changes predictably with temperature. That means SS316L, Ni200, and Titanium. Kanthal and Ni80 have very stable resistance and cannot be used in TC mode. If you try to run TC with a Kanthal coil, the mod won’t be able to read temperature changes and TC will either not engage or give inaccurate results.
What wattage should I start at?
Always start at the low end of your coil’s recommended range. If the coil says 30 to 60W, start at 30. Take a few puffs and increase by 5W until you find the sweet spot. Starting too high can scorch the wick on a fresh coil, which ruins the cotton and gives you a burnt taste that lingers.
How often should I rewick?
Every 3 to 7 days for most vapers. If you use sweet or dark e-liquids, you’ll need to rewick more often because the sweeteners gunk up the cotton faster. You’ll know it’s time when flavor starts to fade, vapor production drops, or you get a slightly off taste. Rewicking takes about 5 minutes once you’ve done it a few times.
Is a mechanical mod safe for beginners?
No. Mechanical mods have no safety features. No short circuit protection, no low resistance cutoff, no overheat protection. If you build incorrectly on a mech mod, the battery can vent or worse. Beginners should start with regulated mods, learn Ohm’s Law, understand battery safety, and practice building on a regulated device before ever considering a mechanical mod.
What’s the difference between MTL and DTL customization?
They’re almost opposite approaches. MTL customization focuses on higher resistance coils (0.8 to 1.5 ohm), lower wattage (8 to 20W), tight airflow, 50/50 PG/VG juice, and higher nicotine. DTL customization uses low resistance coils (0.1 to 0.3 ohm), high wattage (40 to 100W+), open airflow, 70/30 or 80/20 VG/PG juice, and low nicotine. The hardware, settings, and juice are all different. For a full breakdown, see our MTL vs DTL vs RDL guide.
How much does it cost to start building coils?
Basic tools run about $30 to $40. You need wire cutters, a coiling tool or small screwdriver, ceramic tweezers, and an ohm reader (though most regulated mods can read resistance). Wire and cotton are cheap. A $10 spool of Kanthal and a bag of organic cotton will last over a year. If you’re currently spending $20 every two weeks on factory coils, the tools pay for themselves in about a month.
For more on vaping costs and savings, check our guides on vape pricing and vape deals.
Customizing your vape setup is a journey. Start with the easy stuff like airflow and wattage. Move to e-liquid experimentation. Then, when you’re ready, learn to build coils. Each step opens up new possibilities and brings you closer to a vape that’s genuinely yours. If you’re brand new to vaping altogether, our how to vape guide covers the basics. For hardware options across all budgets, browse our picks for vape pen kits and best disposable vapes. And for an external perspective on maximizing your setup, Vapeast has a useful customization guide worth reading.
The Vape Observation team is composed of experienced e-cigarette enthusiasts. We are committed to bringing you the latest and best e-cigarette information. For more information, please follow us on Facebook and Twitter/X!